The
Compose
Window
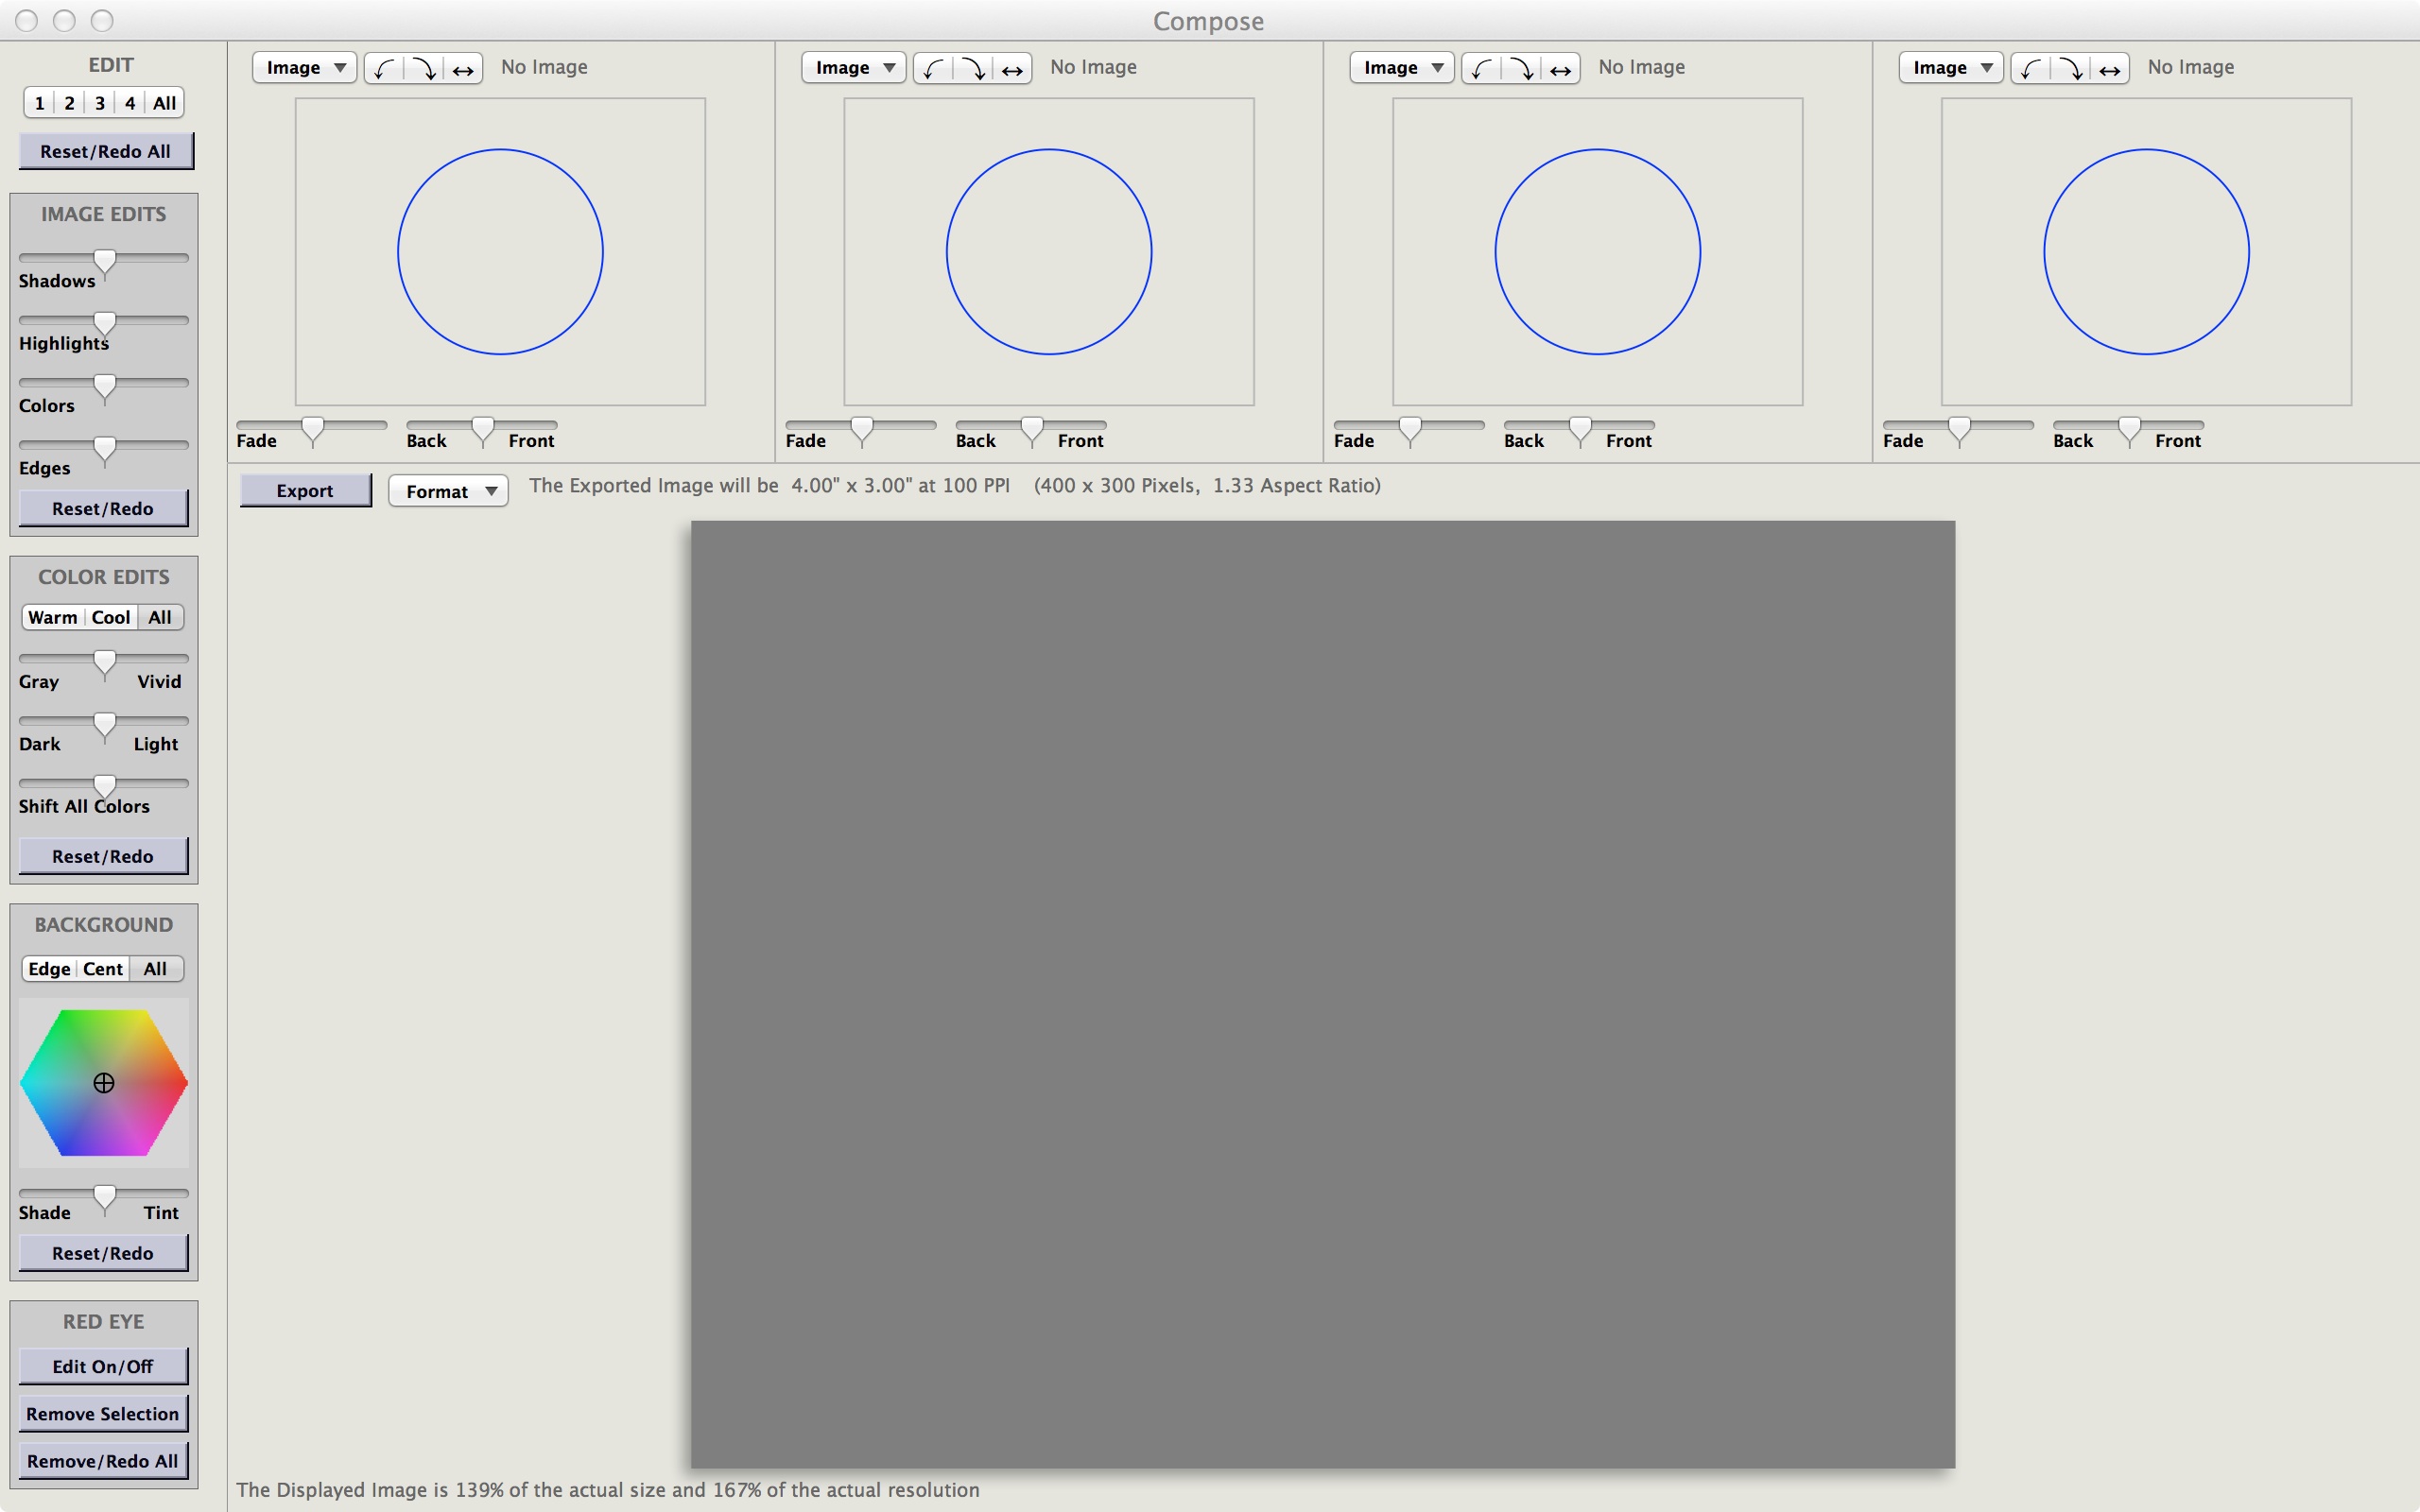
The Compose Window contains the following 6 panes:
- There are 4 identical input panes across the top
- An output pane on the bottom
- A tool bar on the left
Compose operates by opening images in the input panes, selecting the area of interest by moving and sizing the circular cursors, then positioning and sizing these areas on the output image. The parts can be individually or collectively edited and a blended color background can be applied.
Input
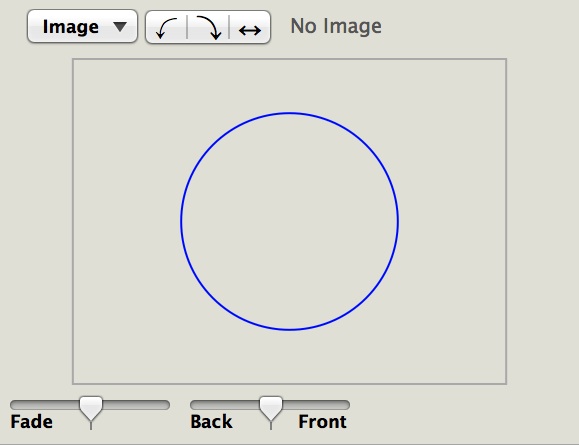
An Image can be opened in a input pane by drag and drop or by one of the import or copy selections in the Image Popup Menu (shown below).
The three orientation buttons adjust the image 90 degrees CCW, 90 degrees CW, or horizontal flip. These buttons can be applied multiple times. Since the image can be rotated to an arbitrary angle on the output, the first two buttons are primarily for convenience, but the flip button is necessary to achieve any orientation.
If an image has been imported, its filename is shown, otherwise "No Image" is shown.
The area within the circle is the region of the input image that will be placed onto the output image. The size and location of the circle can be adjusted interactively with the cursor. Clicking inside the blue circle selects this input image and the circle can be dragged to any location in the input image. Clicking on the circle perimeter selects it and you can drag the circle to a new size.
The Fade Slider blends the edges of this region and the Back/Front slider moves the region to the back or front of other regions on the output. On the output, image regions are always in front of the background color pattern but the fade control allows the background to show through.
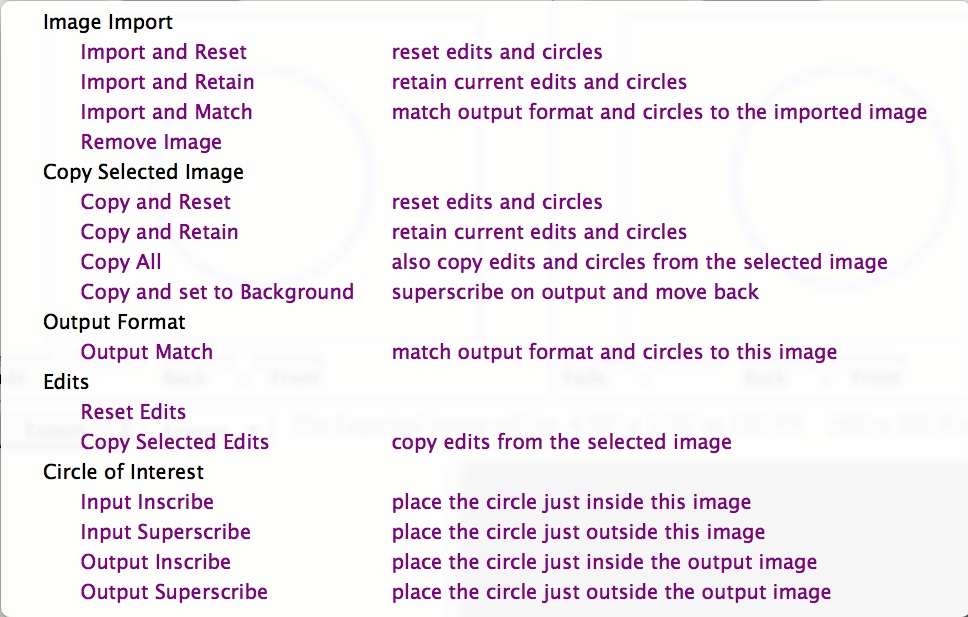
The input popup menu has the following five groups of operations
- Image Import uses the open panel to select an image file. Additionally, the circle of interest, image edits and the output location can be reset, or any previous adjustments can be retained, or the output can be set to match the input file in size and aspect and the circles set so the image is shown full size. Finally, the image can be removed. This does not affect the original image file.
- Copy Selected Image copies an image from another input pane. The image to be copied is shown by a white circle and is selected by clicking inside an image circle on one of the inputs or output panes or by using the buttons at the top of the tool bar. Additionally, the regions and edits can be reset, or the previous ones retained, or the regions and edits from the source image can be copied. Finally, the source image can be set to cover the background and the back/front slider set to the back position.
- Output Format uses output match to set the output image format to match the input image format and to set output image size to the input imagesize.
- Reset Edits clears the input image edits. Copy selected edits copies the edits from the selected input.
- Circle of Interest sets the circles on either the input image
or the output image to either inscribe or superscribe.
Image
The output pane is used to assemble the output image from the selected regions of the input images. The cursor is used to interactively drag the objects to the size and position desired.
The export button opens the save panel for saving the output image.
The format popup menu is used to set the output image format: orientation, size, resolution. The top text string gives the format that will be used for the saved image. The format popup menu is described below.
The bottom text stream reports the size and resolution seen on the screen relative to the size and resolution that will be saved in the output image file.
Format
Popup Menu |
For
Compose, the image format consists of three parameters
Although this menu is lengthy, it will be only occasionally used and it was judged that it was best to have all the options visible at once. Adjusting image format requires specifying constraints and this can be confusing. This example illustrates the problem Assume the image is 4"x3" at 100 ppi (pixels per inch). Thus, the pixel size is 400 x 300. If we want to change the image to twice the size of 8"x6" do we intend to preserve the resolution, resutling in 800x600 pixels, or do we intend to preserve the pixels, resulting in 50 ppi resolution. Generally, Compose will preserve the resolution when the image format is changed. The following constraints are used
|
Tools
 |
EDIT
TOOLS The 1/2/3/4/All selector
shows which of the inputs are selected for editing or
placing. An input can be selected either with the buttons,
or by clicking inside the blue circle on an input or
output views. When selected, the circle is shown in white.
Selecting All or clicking outside any circle on the input
or output views, selects all the inputs and shows all the
circles in blue.
The Reset/Redo All button removes and restores all image edits, color edits, background and red eye edits. |
| IMAGE
EDITS The Shadows Slider adjusts the brightness/darkness of
the shadows.
The Highlights Slider adjusts the brightness/darkness of the highlights The Colors Slider adjusts
the color saturation (gray/vivid).
The Edges Slider adjusts the image sharpness (sharp/blur). Reset/Redo Button removes/restores the image edits for all the inputs. |
|
| COLOR EDITS The
Warm/Cool/All selector sets the colors that will be
adjusted by the three sliders. You may choose to edit only
the warm colors, only the cool colors, or all of the
colors. These edits are accumulative in any order.
Warm colors are yellow/red, red and red/magenta. Cool colors are yellow/green, green, cyan, blue and blue/magenta. The transition colors are yellow and magenta. The tone adjustments are Gray/Vivid Dark/Light Please review the tone tutorial for their definition For warm color shift, reds shifts towards yellows or megentas. For cool color shift green, cyan, blue shift towards yellow,green, cyan or towards cyan, blue, magenta. The color shift edits are accumulative in any order. |
|
| BACKGROUND
EDITS For parts of the output not
covered by images, any background color can be set. The
edge color and center color can be set the same or
independently and a smooth color blend is created between
the two colors.
Any selected color can also be tinted or shaded. Please review the tone tutorial for their definitions. |
|
|
RED EYE
The procedure for removing red eye is
Turning Edit OFF will remove the red eye cursors, but will retain the red eye removal. If you want to remove a selection, Turn Edit On, select inside the circle for the eye you want, then press the remove selection button. If you copy an image to another input, the red eye corrections will also be copied. |